A sunny and warm Summer holiday is over, back to business ![]() I had a task to do a system installation of ProjectServer 2013.
I had a task to do a system installation of ProjectServer 2013. 
Lucky me I realized that I could use a lot of scripts, and easy tasks to achieve my goal neatly. After reading technical articles and the few blog posts out there, it seems all a bit confusing this puzzle. So save time and do this 10 simple steps:
1: First of all you need SharePoint 2013 Enterprise edition up and running, –look for another post on that topic.
2: Download binaries, run the Wizard
3: In Central Admin Start the Service Project Server Services on server(S)
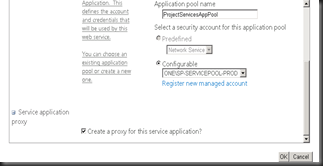
4: From CA, Create a New Project Service Application (note the name) and the SQL server, run this on a separate Managed Account, and create a New Application Pool. 

5: Now it is time to do som PowerShell to create the Content Database, in PS-Admin,
New-SPProjectDatabase -Name “Project_Content_DB” -ServiceApplication “Project Services Application” -DatabaseServer “myDBserver.mydomain.local” -Tag “RapidPerformer”
6: Activate the features on an existing site collections URL, -any SP template on that Url is ok–I used team site. In PS-Admin:
$web=Get-SPWeb http://project
$web.Properties["PWA_TAG"]=”RapidPerformer”
$web.Properties.Update()
Enable-SPFeature pwasite -URL http://project
(PS Features are created and activated, all in one script)
7: Add the PWA WebTemplate
New-SPweb -URL http://project/PWA -Template pwa#0
8: Upgrade the WebInstance
Upgrade-SPProjectWebInstance -Identity http://project –Confirm:$False
9: Do the IIS reset
