Finally a new blog post uh… Today the story is all from Azure. I recently got a request for setting up Active Directory on two Azure Vm’s –not the WAAD!! the full AD to use for SQL 2014 and SP 2013 +++ So here it is; a step by step guide using only PowerShell (almost ![]() ) to create the VM’s. This post will be the first in line of a series of articles relatetd to Azure VM’s.
) to create the VM’s. This post will be the first in line of a series of articles relatetd to Azure VM’s.
#1 the PublishingSettingsfile
Well first thing first, whatever you like to do, remote PS is the thingi,
Download Azure PowerShell modules
Then you need the the publishing settings file, pls run as Admin in PowerShell ISE, and Add-AzureAccount (sign in)
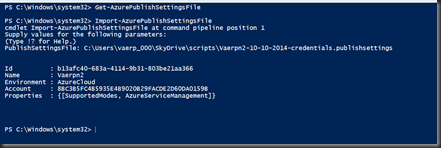
Get-AzurePublishingSettingsFile

This will open a browser session where you can download the correct subscription file, for security reasons I am not giving this file a friendly name, and storing it on my OneDrive (client PC is also BitLocker enabled) If you are not able to download the subscription file –well then you are not Admin of the Azure Portal.

Import-AzurePublishingSettingsFile and you are good to go
#2 Get the latest and greatest Operating System Image
There is always new releases of OS and their builds, today it is Win Server 2012 R2 that rocks, this script will provide you with the latest Image.
Get-AzureVMimage | where imagefamily -eq "Windows Server 2012 R2 datacenter" | sort-object PublishedDate -Descending | select-object -first 1

Copy ImageName –the long GUID a69949… You will need that for the creation script
#3 Create the VM’s
I assume that you have created the Virtual network and a storage account in the Azure Portal. You will need the name of those in the creation script for deploying a new wm. Also OS ImageName from #2 and the Subscription file from #1.
Here is my script – simply change $vmname and $service for every unique VM you are creating –like VAERPNAD02 in my case.
Run as Admin in PS ISE:
#Deploy a new VM
#——————————————-
# OS Image to Use
$image = "a699494373c04fc0bc8f2bb1389d6106__Windows-Server-2012-R2-201409.01-en.us-127GB.vhd"
$vmname = "VAERPNAD01"
$service = "VAERPNAD01"
$vnet = "Azure-LAN1"
$pwd = "StrongPassw0rd"
$size = "Standard_A2"
$un = "myadmin"
$storageAccount = "locne1"
$subName = "Pay-As-You-Go"
$location = "North Europe"
Import-AzurePublishSettingsFile C:\Users\vaerp_000\SkyDrive\scripts\downloadedsubscriptionfile-credentials.publishsettings
Select-AzureSubscription -SubscriptionName $subName
Set-AzureSubscription -SubscriptionName $subName -CurrentStorageAccount $storageAccount
$newVM = New-AzureVMConfig -name $vmname -InstanceSize $size -ImageName $image | Add-AzureProvisioningConfig -AdminUserName $un -Windows -Password $pwd | Set-AzureSubnet -SubnetNames ‘Subnet-1’
New-AzureVM -ServiceName $service -Location $location -VMs $newVM -VNetName $vnet
#4 Add datadisks
I always add datadisks in the size of 1024 Gb, because in Azure you only pay for the used space. Additional datadisks are also none cache so this is faster for SQL, AD, SP and so on. OS disk are by default read/write.
In this script I add to additional datadisks. Still in PowerShell ISE as admin ![]()
Get-AzureVM VAERPNAD01 -Name VAERPNAD01 | Add-AzureDataDisk –CreateNew -DiskSizeInGB 1024 -DiskLabel "Data1" -LUN 0 | Update-AzureVM
Get-AzureVM VAERPNAD01 -Name VAERPNAD01 | Add-AzureDataDisk -CreateNew -DiskSizeInGB 1024 -DiskLabel "Data2" -LUN 1 | Update-AzureVM
That’s it!
– we can now start to deploy the Active Directory Directory Services and configure the AD Farm…. stay put for my next post… ![]()
